
Singer Sewing Machine Manual E99670: A Comprehensive Guide
This guide details the Singer E99670, a heavy-duty machine with 32 stitches, perfect for diverse fabrics. It offers instructions, safety precautions, and troubleshooting tips for optimal performance.
The Singer E99670, often associated with the Singer 50T8 model, represents a blend of enduring legacy and robust functionality within the Singer sewing machine lineup. Since its inception in 1851, Singer has been synonymous with innovation in sewing technology, and the E99670 continues this tradition. This machine is designed as a “heavy duty” option, capable of handling a wide range of fabrics, from lightweight materials to durable denim.
This model boasts 32 built-in stitches, providing versatility for various sewing projects. It’s engineered with an emphasis on both strength and user-friendliness, making it suitable for beginners and experienced sewists alike. The accompanying manual, available for download as a PDF, serves as a comprehensive resource for understanding the machine’s features, operation, and maintenance. Proper utilization of this guide ensures optimal performance and longevity of your Singer E99670.
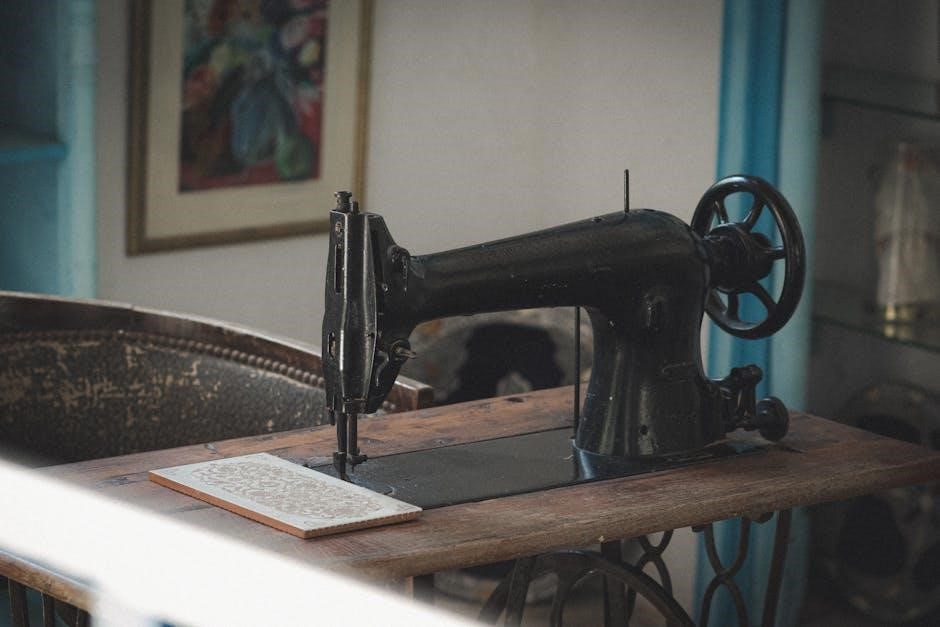
Historical Context of Singer Sewing Machines
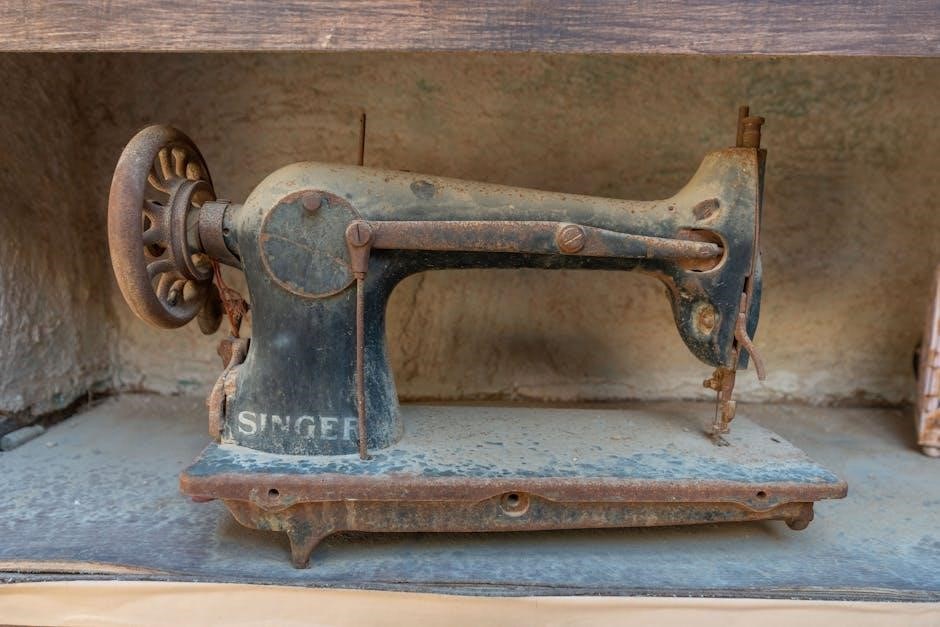
The story of Singer begins in 1851 with Isaac Singer’s patent for the first practical sewing machine, a pivotal moment that revolutionized the garment industry and home crafting. Prior to this, sewing was a laborious, time-consuming handcraft. Singer’s innovation dramatically increased efficiency and accessibility, quickly establishing the company as a leader.
Throughout the 19th and 20th centuries, Singer continued to pioneer advancements in sewing technology, introducing electric motors and various stitch mechanisms. The brand became a household name, synonymous with quality and reliability. The E99670, while a more recent model, builds upon this rich heritage of engineering excellence. Its heavy-duty construction reflects a commitment to durability, a hallmark of Singer machines for over 170 years. Understanding this history provides context for the enduring appeal and trusted performance of the Singer E99670.
Understanding the Singer 50T8 Model
The Singer 50T8, often associated with the E99670 manual, represents a robust and versatile sewing machine designed for a wide range of projects. It’s recognized for its dependable performance and ability to handle heavier fabrics like denim, making it a favorite among both beginners and experienced sewers. This model bridges the gap between basic and advanced machines, offering a substantial feature set without overwhelming complexity.
Key characteristics include a heavy-duty metal frame, contributing to stability and longevity, and a selection of built-in stitches catering to diverse sewing needs. The 50T8 is designed for user convenience, featuring a free arm for easier cuff and collar work. The E99670 manual provides detailed instructions for operation, maintenance, and troubleshooting, ensuring users can maximize the machine’s potential and maintain its optimal condition for years to come.
Key Features of the E99670
The Singer E99670 boasts a powerful combination of features designed for both ease of use and durability. A standout element is its heavy-duty metal frame, providing exceptional stability even during demanding sewing tasks. This machine offers 32 built-in stitches, encompassing options for various techniques – from basic straight and zigzag stitches to decorative and functional applications;
Furthermore, the E99670 features an extra-high sewing speed, accelerating project completion. The convenient free arm design simplifies sewing cuffs, collars, and other cylindrical items. The machine is compatible with a range of optional presser feet, expanding its versatility. Detailed instructions within the E99670 manual guide users through utilizing these features effectively, ensuring a smooth and enjoyable sewing experience.
Built-in Stitches and Their Applications
The Singer E99670 provides 32 built-in stitches, catering to a wide spectrum of sewing projects. Basic stitches, like the straight stitch, are ideal for constructing garments and general sewing. Zigzag stitches offer elasticity and are perfect for finishing raw edges or creating decorative accents. The machine also includes stretch stitches designed specifically for knit fabrics, preventing puckering and ensuring a professional finish.
Decorative stitches add a personalized touch to projects, enabling embellishments and creative designs. Buttonhole stitches automate the process of creating perfectly sized buttonholes. The manual details each stitch’s specific application, offering guidance on selecting the appropriate stitch for different fabrics and techniques. Mastering these stitches unlocks the full potential of the E99670, allowing for both functional and artistic sewing endeavors.
Heavy-Duty Metal Frame: Benefits and Durability
The Singer E99670 boasts a robust, heavy-duty metal frame, a crucial component contributing to its longevity and performance. Unlike machines with plastic interiors, the metal frame minimizes vibrations while sewing, resulting in increased stitch consistency and overall stability. This construction allows the machine to handle thicker fabrics, such as denim and multiple layers, without compromising power or precision.
The durable metal frame significantly extends the machine’s lifespan, resisting wear and tear from frequent use. It provides a solid foundation for all sewing operations, ensuring reliable performance over time. This feature is particularly beneficial for users who undertake large or complex sewing projects. Investing in a machine with a metal frame guarantees a dependable sewing companion for years to come, offering both power and resilience.
Safety Precautions for Operation
Prior to operating your Singer E99670, carefully review all safety instructions detailed in the manual. Always disconnect the power supply when changing the needle, threading, or performing any maintenance. Never sew over broken needles; this poses a significant safety hazard. Keep fingers away from the needle area while the machine is running.
Ensure the machine is placed on a stable, level surface during operation. Avoid using the machine in damp or wet environments to prevent electrical shock. Always use genuine Singer accessories and parts to maintain safety standards. Supervise children closely when they are near the sewing machine, and store it securely when not in use. Regularly inspect the power cord for damage and replace if necessary. Following these precautions will ensure a safe and enjoyable sewing experience.
Setting Up Your Singer E99670
Begin by placing your Singer E99670 on a sturdy, level surface with ample workspace. Connect the power cord to a grounded outlet and ensure the power switch is in the “off” position. Attach the foot pedal securely to the machine. Next, install the bobbin following the instructions in the manual – proper bobbin insertion is crucial for smooth operation.
Then, attach the presser foot appropriate for your fabric. Raise the presser foot lever to thread the upper thread, following the numbered threading path. Lower the presser foot and ensure the thread is properly engaged with the bobbin thread. Finally, select your desired stitch using the stitch selection dial and adjust the stitch length and width as needed. Your Singer E99670 is now ready for use!
Threading the Machine: A Step-by-Step Guide
First, raise the presser foot; this releases tension discs, allowing the thread to seat correctly. Place the spool of thread on the spool pin. Guide the thread through the first thread guide, then down and around the tension disc. Next, continue threading through the take-up lever, ensuring the thread is securely caught.
Then, lead the thread down through the second thread guide and finally through the needle clamp. Thread the needle from front to back. After that, draw up a sufficient length of thread – about six inches – and gently pull to ensure it’s properly seated. Proper threading is vital for consistent stitch quality and preventing machine malfunctions. Refer to the diagrams in your manual for visual assistance during this process.
Winding the Bobbin

Begin by placing the spool of thread on the spool pin. Then, draw the thread through the thread guide and onto the bobbin; Secure the thread end onto the bobbin by winding it around several times by hand. Next, slide the bobbin onto the bobbin winder spindle;
Engage the bobbin winder by pushing it to the right. Press the foot pedal gently to start winding. The machine will automatically stop when the bobbin is full. Once complete, disengage the bobbin winder and remove the bobbin. Ensure the thread is cut flush with the bobbin edge. Consistent bobbin winding is crucial for even stitch formation and preventing thread nests. Always use the correct type of bobbin for your Singer E99670 model.
Bobbin Insertion and Tension Adjustment
To insert the bobbin, open the bobbin case cover. Position the bobbin with the thread unwinding in a counter-clockwise direction. Guide the thread through the tension spring and then through the slot. Ensure the thread engages the take-up lever. Close the bobbin case cover securely.
Adjusting the bobbin tension is vital for balanced stitches. A loose tension results in loops on the underside of the fabric, while tight tension causes puckering. Use the bobbin tension screw to make small adjustments. Test the tension on a scrap fabric, observing the stitch quality. Proper tension ensures a smooth, even stitch. Refer to the manual for specific tension settings based on fabric type and thread weight. Consistent tension is key to professional-looking results.
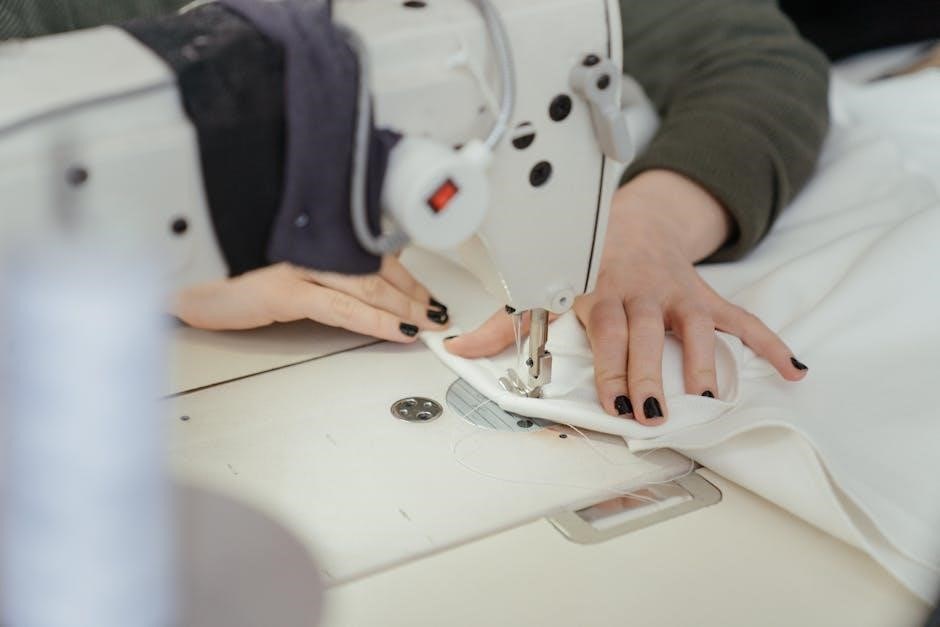
Basic Sewing Techniques with the E99670
The Singer E99670 excels at fundamental sewing tasks. Begin by selecting a stitch using the stitch selection dial. Adjust the stitch length and width according to your project needs. Practice straight stitching on scrap fabric to establish consistent seam allowances. Utilize the reverse lever for secure backstitching at the beginning and end of seams.
For curved seams, sew slowly and carefully, gently guiding the fabric. The free arm feature is invaluable for sewing cuffs, collars, and sleeves. Experiment with different presser feet to achieve specialized results. Mastering these basic techniques unlocks the full potential of your machine. Remember to always test settings on scrap fabric before working on your final project, ensuring optimal stitch quality and a professional finish.
Using the Free Arm Feature
The Singer E99670’s free arm transforms the machine for cylindrical projects. Detach the extension table to reveal the free arm space. This feature is ideal for sewing cuffs, sleeves, trouser hems, and other similarly shaped items. Position the fabric around the arm, allowing you to maneuver it easily for precise stitching.
Select an appropriate stitch and adjust the settings as needed. The free arm provides enhanced control and accessibility, simplifying the sewing process for challenging shapes. Practice on scrap fabric first to become comfortable with the technique. Remember to maintain a consistent sewing speed for even results. This feature significantly expands the machine’s versatility, enabling you to tackle a wider range of sewing projects with confidence.
Troubleshooting Common Issues
Encountering problems with your Singer E99670? Thread bunching often indicates incorrect threading or bobbin insertion – re-thread carefully and ensure proper bobbin placement. If the needle breaks, use the correct needle type for your fabric and verify it’s securely inserted. Skipped stitches can stem from a dull needle, incorrect tension, or improper threading; replace the needle and adjust tension accordingly.
For uneven stitching, check presser foot pressure and fabric feed. A jammed machine usually requires removing the bobbin case and clearing any tangled threads. Always disconnect the power before attempting any internal repairs. Refer to the manual for detailed diagrams and solutions. If issues persist, seek professional assistance to avoid further damage; Regular maintenance minimizes these common problems.
Needle and Presser Foot Selection Guide
Choosing the right needle and presser foot is crucial for successful sewing with your Singer E99670. Universal needles suit most woven fabrics, while ballpoint needles are ideal for knits, preventing skipped stitches. Denim needles tackle heavy-duty materials like jeans. For delicate fabrics, use a sharp or microtex needle. Needle sizes correspond to fabric weight – smaller numbers for finer fabrics, larger for heavier ones.
Presser feet enhance functionality. The all-purpose foot handles everyday sewing, the zipper foot navigates zippers smoothly, and the buttonhole foot creates precise buttonholes. A satin stitch foot is perfect for decorative stitches, and the free arm allows for cuff and sleeve work. Consult your manual for a complete list and specific applications. Proper selection ensures optimal stitch quality and prevents fabric damage.

Maintenance and Cleaning
Regular maintenance extends the life of your Singer E99670. Always unplug the machine before cleaning. Remove lint buildup from the bobbin area and feed dogs using a brush – lint accumulation causes skipped stitches and malfunctions; Periodically oil the machine, focusing on moving parts as detailed in the manual; avoid over-oiling.
Wipe the exterior with a soft, damp cloth. Never use abrasive cleaners or solvents. Clean the needle plate frequently to prevent oil and fabric residue buildup. Inspect the feed dogs for damage. Proper cleaning and oiling ensure smooth operation and prevent costly repairs. Following the manual’s guidelines will keep your Singer E99670 running efficiently for years to come, maintaining its performance.
Singer Sewing Machine Accessories
Enhance your Singer E99670’s capabilities with a range of accessories. Essential items include extra needles (various sizes for different fabrics), bobbins (ensure compatibility with your model), and presser feet – a zipper foot, buttonhole foot, and all-purpose foot are highly recommended. Consider a seam ripper for correcting mistakes and a quilting guide for precise stitching.
Additional accessories like a fabric guide, needle threader, and lint brush improve convenience and efficiency. Singer offers accessory kits tailored to specific sewing projects. Explore options for specialized feet, such as a walking foot for quilting or a gathering foot for creating ruffles. Investing in quality accessories unlocks the full potential of your E99670, expanding your creative possibilities and simplifying complex tasks;
Finding Additional Support and Resources
For further assistance with your Singer E99670, Singer’s official website provides a wealth of resources, including frequently asked questions, troubleshooting guides, and downloadable manuals in PDF format. You can also access expert support for Singer, Pfaff, and Husqvarna Viking machines through their online channels. Explore online sewing communities and forums where users share tips, tricks, and solutions to common issues.
YouTube is a valuable resource, hosting numerous tutorial videos demonstrating various techniques and machine features. Don’t hesitate to contact Singer’s customer support directly for personalized assistance. Remember to have your machine’s model number readily available when seeking support. Utilize Facebook Marketplace and groups for potential connections with local repair technicians or fellow E99670 owners.
Warranty Information and Terms & Conditions
Singer sewing machines, including the E99670, are typically covered by a limited warranty against defects in materials and workmanship. The standard warranty period is generally one year for parts and labor, commencing from the original date of purchase. However, specific warranty terms can vary based on the retailer and region, so it’s crucial to retain your proof of purchase.
The warranty typically excludes normal wear and tear, misuse, accidents, or unauthorized repairs. To make a warranty claim, contact Singer’s customer support with your machine’s model number and purchase details. Review the complete warranty documentation, often included with the machine or available on Singer’s website, for a comprehensive understanding of coverage and limitations. Always register your machine to streamline the warranty process.
Where to Download the E99670 Manual (PDF)
Finding a digital copy of the Singer E99670 manual is readily achievable through several online resources. Singer’s official website is the primary source, often hosting manuals in the ‘Support’ or ‘Manuals’ section; navigate by model number to locate the PDF. Alternatively, numerous third-party websites specialize in hosting user manuals, offering free downloads for various Singer models, including the 50T8 and E99670.
Websites like ManualsLib and similar platforms provide accessible PDF versions. A quick internet search using terms like “Singer E99670 manual PDF” will yield numerous results. Ensure the website is reputable before downloading to avoid potential security risks. Downloading the manual allows convenient offline access to instructions, troubleshooting guides, and safety information for your sewing machine.
Singer Machine Updates and Stitch Guides
Singer frequently provides updates and supplementary stitch guides to enhance the functionality and user experience of their sewing machines, including models like the E99670; These resources often include new stitch patterns, software enhancements, and detailed instructions for utilizing advanced features. Accessing these updates typically involves visiting the official Singer website’s ‘Support’ section and searching for updates specific to your machine model.
Stitch guides offer detailed explanations and visual examples of each built-in stitch, demonstrating its optimal applications for various fabrics and sewing projects. These guides can significantly expand your creative possibilities and improve the quality of your finished work. Singer’s online resources also feature tutorials and project ideas, providing inspiration and guidance for both beginner and experienced sewers. Regularly checking for updates ensures your machine operates at peak performance.